
For a bit of background, Nora is my little in my sorority (I introduced her to y'all in this post) and is a sophomore at Clemson! She is a Marketing major from Boston and we both bonded over our love of preppy blogs. Here's a picture for reference even though I'm sure y'all know her from My Chic Week posts.

Hi everyone! I am so excited to be sharing a post on Katie’s blog today about making your own inspiration board. It’s a super easy, personalized, and cheap way to decorate your room or apartment! I love looking at mine everyday and everyone who comes into my room always compliments it. It’s a great way to share the things and people you love without breaking the bank (and you can change it whenever you want!).


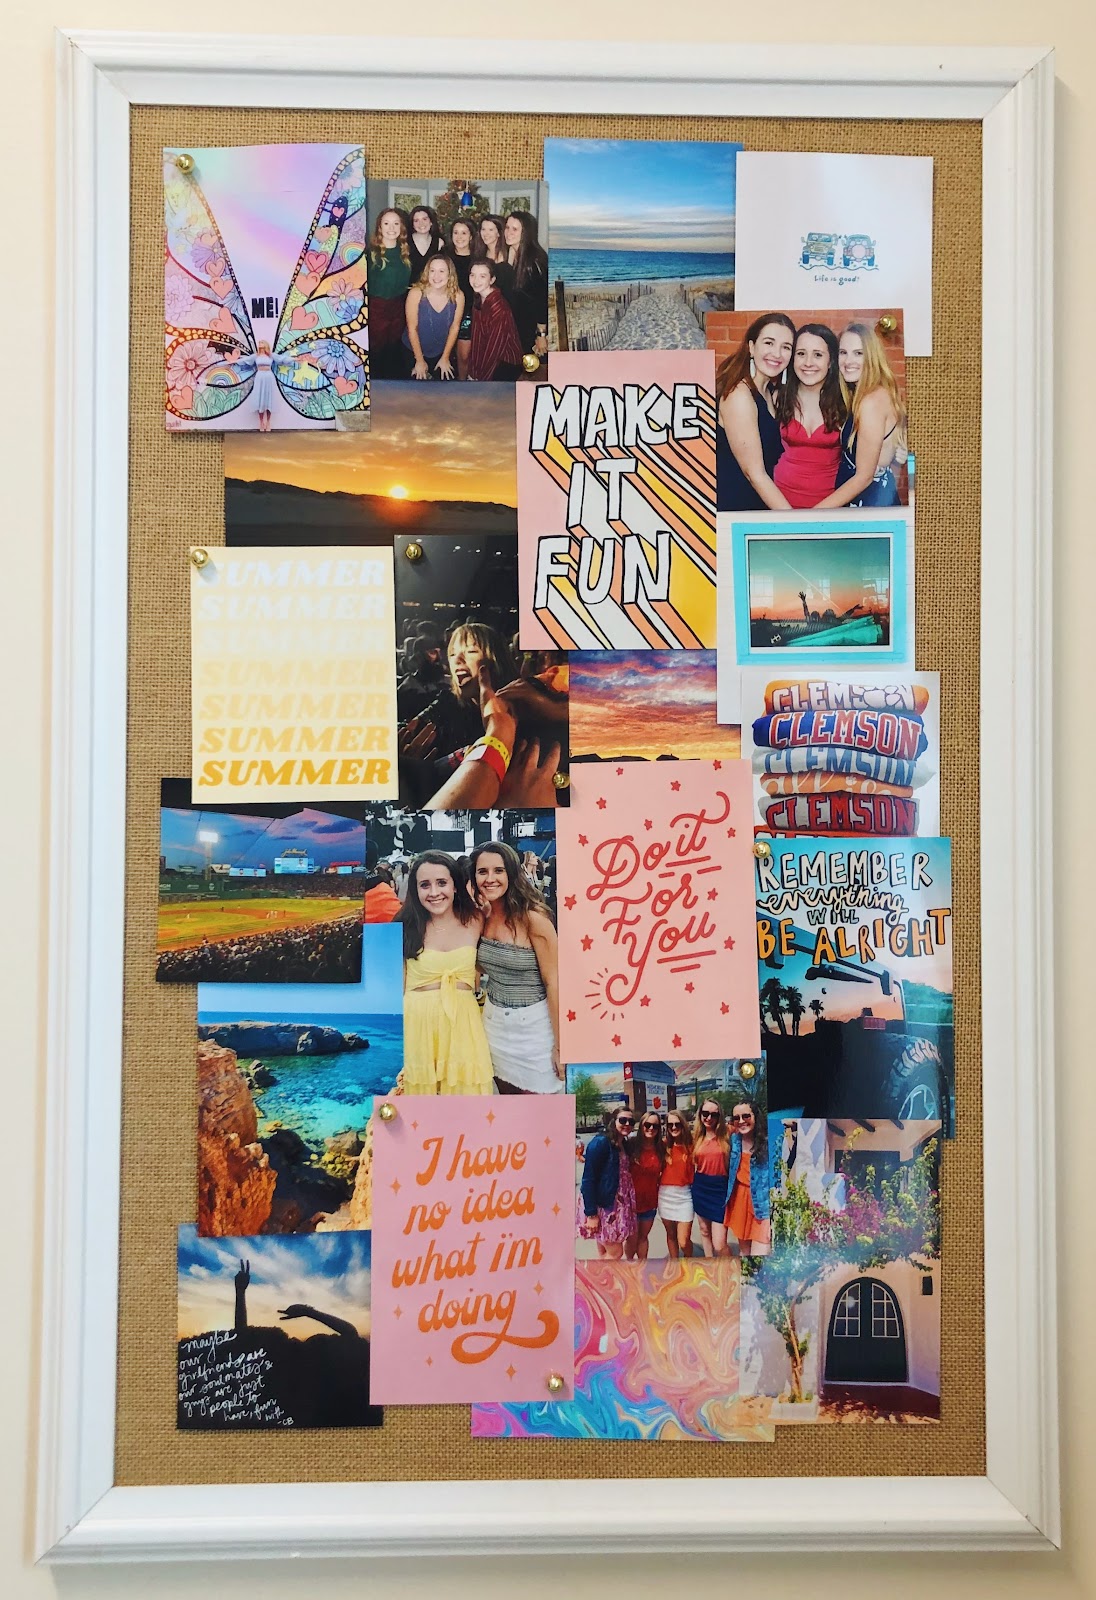
Things You’ll Need:
· Corkboards/bulletin boards (I used two of these but you can find them anywhere or even DIY some!)
· Printed photos (I ordered mine from Shutterfly and Katie printed hers at home – both ways worked really well)
· Push pins/tape (I used these to add a pop of gold)
After you have all your supplies, it’s quick and easy to make your actual inspiration boards! I started by going through my photos and grouping certain ones together. Most of my photos were either 4x6 or 4x4, but I cut a few of them down to be even smaller. I found the graphics/quotes on Pinterest (here’s my board of all my inspiration board ideas) and VSCO, and then the rest are ones of me/ones I took! After I went through my photos, I started hanging them onto the boards. I found it easiest to start in a corner and work my way across the board. I think it looks the best to have the photos layered and not evenly spaced out. On my boards, I used a lot of nature photos and prints in the background as a way to fill the space. There’s really no right or wrong way to do this, just play around with it and see what you like the most! When photos were layered on top of each other, I made sure to tape them together using double stick tape. They’ve all stayed up so far (I put it up in August) so I’m hoping it’ll last all year! After all your photos are pinned/taped up, you’re done!
You can personalize your board even more by adding old notes/tickets/memories. I’m thinking of adding some of my football wristbands from this year or some of my plane tickets from the summer and last school year.

Thanks so much to Katie for letting me share this post today! I had so much fun writing it and I hope you all enjoyed reading it!


No comments:
Post a Comment